Our Location
304 North Cardinal St.
Dorchester Center, MA 02124


The same IP address keeps showing up in your login logs, hour after hour, even after a lockout period ends. That’s not bad luck. It’s a persistent attacker who already found your site and isn’t giving up after one timeout.
Every site with a public login page deals with this eventually. Temporary rate limiting alone won’t stop an IP that just waits out the clock and comes back.
This guide covers how to permanently blacklist an IP using BruteFort’s IP Settings panel, how to whitelist your own IP so you’re never locked out of your own site, and when to reach for geo-blocking instead of blocking IPs one by one.
Quick Answer: Go to BruteFort → Settings → IP Settings, choose BlackList from the dropdown, enter the offending IP address, and click Add. The block takes effect immediately and stays until you remove it. Add your own IP under WhiteList first, so none of your blocking rules can ever lock you out.
Temporary lockouts from rate limiting handle the routine automated traffic. Permanent IP blocking makes sense in these situations:
BruteFort’s IP Settings tab manages both blacklisting and whitelisting from a single interface. Here’s the process:
45.123.221.24)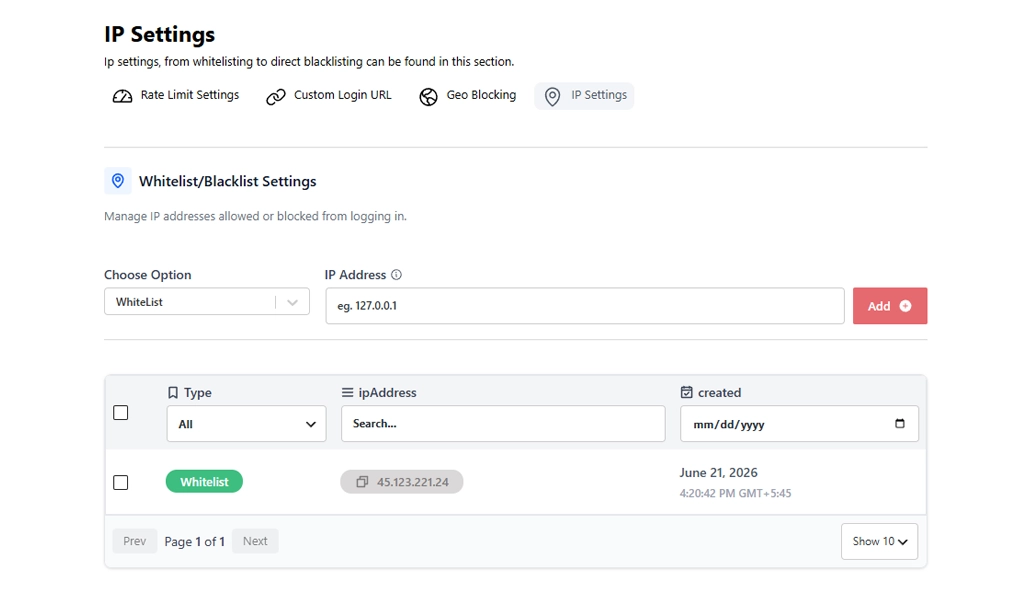
The IP is now permanently blocked from your WordPress login page. It appears in the table below with its type (Blacklist), address, and date added.
Note: You can search and filter this table by type or IP, and delete any entry to unblock an address at any time.
BruteFort’s Logs screen is the fastest way to find which IPs deserve a permanent block. Every lockout event is recorded with the IP address, number of failed login attempts, current status (locked or expired), and timestamp. IPs that appear multiple times — especially ones that return after each lockout period expires — are clear candidates for a permanent blacklist entry.
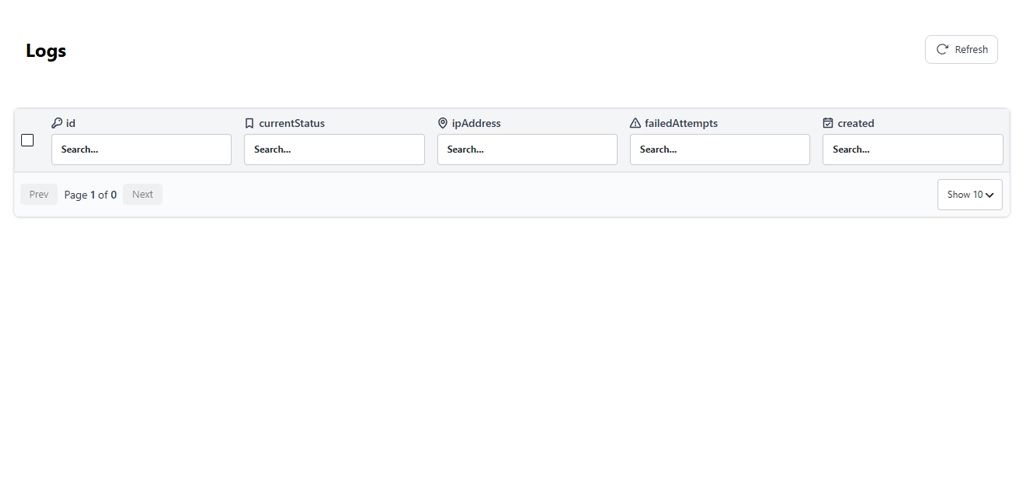
Search the logs by IP address to see the full attempt history for a specific address before deciding. An IP that triggered 3 lockouts across 3 days is worth blocking permanently. One that hit the limit once and never returned probably isn’t.
Before setting up aggressive blocking rules, add your own IP to the WordPress IP whitelist. Whitelisted IPs are completely exempt from rate limiting, lockout after failed login, and all blocking rules — meaning you can never accidentally lock yourself out of your own admin.
The process mirrors adding a blacklist entry. Go to IP Settings, select WhiteList from the dropdown, enter your IP address, and click Add. Find your current IP by searching “what is my IP” in any browser.
Pro Tip: If you manage sites from multiple locations — office, home, client site — whitelist each IP separately so none of them ever get caught by a blocking rule.
Individual IP blocking is precise and targets specific addresses. WordPress geo blocking login restrictions are broader — they block entire countries at once. If you’re seeing high attack volumes from regions where you have no legitimate users, WordPress geo blocking is more efficient than manually adding hundreds of individual IPs to a blacklist.
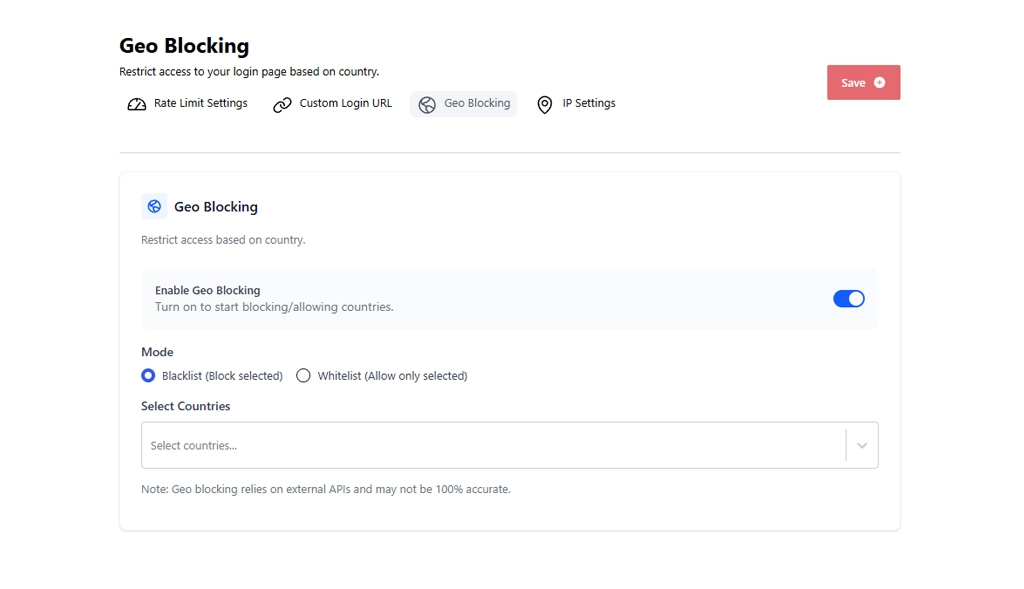
BruteFort’s Geo Blocking tab supports both blacklist mode (block selected countries) and whitelist mode (allow only selected countries). The two systems complement each other: geo blocking filters at the country level first, and individual IP blocking handles specific addresses that slip through or originate from allowed regions.
BruteFort handles individual IP addresses. For blocking IP ranges or subnets using CIDR notation, server-level firewall rules via your hosting control panel or .htaccess are the right tool. BruteFort’s geo blocking provides an effective alternative for blocking large volumes of traffic by country rather than subnet.
BruteFort’s IP blocking applies to the login page specifically. A blocked IP can still browse your public content. Blocking access to your entire site from a specific IP requires a server-level or hosting-level firewall rule outside of WordPress.
Find the IP in the table and delete it — the block lifts immediately. To prevent accidental blocks on known users like agency clients or remote team members, add their IPs to the whitelist proactively. Whitelisted IPs are permanently exempt from all lockout and blocking rules regardless of failed login attempts.
No. A server firewall drops traffic before it reaches WordPress entirely. Plugin-level blocking happens at the WordPress application layer — the request still reaches your server first. It’s effective for login security, but for very high-volume attack traffic, a server firewall or CDN-level service like Cloudflare handles it more efficiently.
IP blocking and whitelisting give you precise control over who can reach your WordPress login page. BruteFort manages both from the IP Settings tab alongside rate limiting, geo blocking, and custom login URL — all the layers of WordPress login security in one free plugin.
You might also like:

