Our Location
304 North Cardinal St.
Dorchester Center, MA 02124


Checking your login logs and seeing hundreds of attempts from countries none of your users are ever in? That’s normal, and it’s also fixable in a couple of clicks. A large share of WordPress login attack traffic — brute force attempts, credential stuffing, automated bot scans — comes from a small handful of countries.
Geo blocking restricts access to your login page based on the visitor’s country, as determined by their IP. It’s not a replacement for rate limiting or a custom login URL — it’s an extra layer that filters out a large chunk of attack traffic before it ever reaches the login form.
Quick Answer: Go to BruteFort → Settings → Geo Blocking, toggle it on, choose Blacklist or Whitelist mode, select your countries, and save. Whitelist mode gives the tightest protection if your users are all in a few known countries.
BruteFort’s Geo Blocking feature offers two modes. Which one you pick depends on where your users actually are.
Blacklist mode blocks selected countries and allows everyone else. Choose this if your user base is global and you only want to cut off specific high-risk regions. Select the countries to block and save — anyone from those countries is denied access to the login page, while the rest of the world can still reach it.
Whitelist mode allows only selected countries and blocks everyone else. This is the stronger option for sites with a defined geographic audience — a local business, a region-specific membership site, or anywhere you know exactly which countries your admins and users are in. Select only those countries, and every other country is blocked by default.
For most sites, whitelist mode is the tighter fit. If you can say “my admins are in the US and UK and my users are never from anywhere else,” whitelist mode eliminates login attack traffic from the entire rest of the world in one setting.
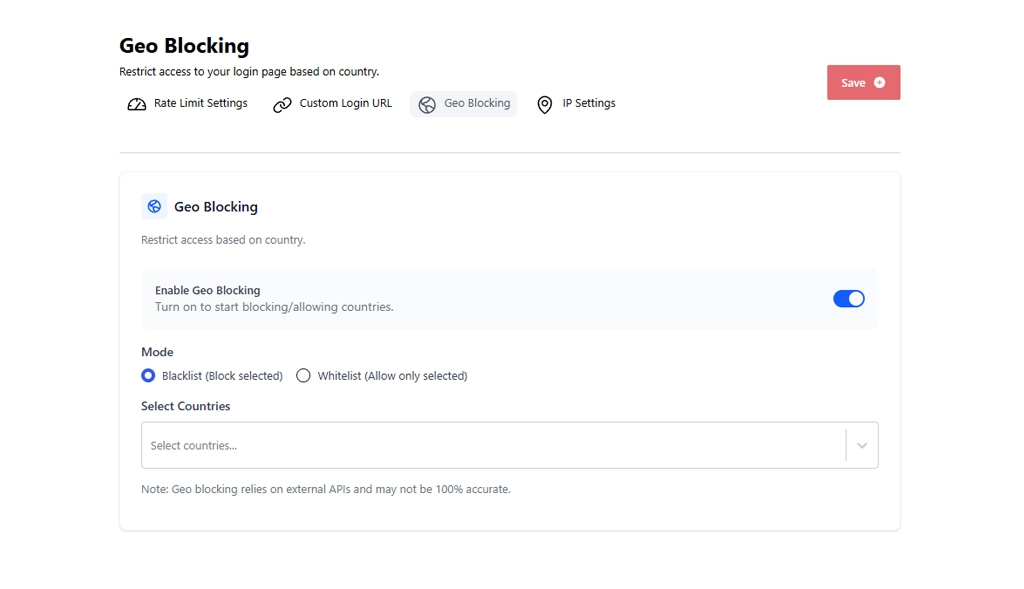
The restriction is active right away. Visitors from blocked countries trying to reach your login page — whether at the default /wp-login.php or your custom login URL — are denied access.

Geo blocking works best as part of a layered login security setup, not a standalone measure. Here’s how the layers interact:
/wp-login.php, eliminating most automated discovery before geo blocking even firesBruteFort handles all four from the same settings panel. Each layer catches what the previous one misses, and together they eliminate most WordPress login attack traffic with no ongoing management.
BruteFort’s geo blocking relies on external geolocation APIs, which are generally accurate but not perfect. VPN users and some corporate networks may appear to be in a different country than they physically are. For most sites the accuracy is more than enough — the goal is reducing attack traffic, not 100% geographic precision. BruteFort notes this directly in the Geo Blocking settings.
Add your IP to the whitelist in BruteFort’s IP Settings tab. Whitelisted IPs bypass geo blocking entirely, so you can log in from anywhere without adjusting your geo blocking settings. This is particularly useful for admins who travel internationally.
Just the login page. Visitors from blocked countries can still browse your public content, read posts, shop on WooCommerce, and interact with anything on the front end. Only the login authentication endpoint is restricted.
Yes, and you should. They work independently and complement each other. Geo blocking filters by country before any credential attempt is made. Rate limiting fires on failed login attempts after access to the login page is granted. So a visitor from an allowed country who tries to brute force their way in still gets stopped by rate limiting. Both layers together is the strongest setup.
Geo blocking is a high-leverage filter — a few country selections can eliminate a large share of automated login attack traffic with no ongoing effort. BruteFort handles it from the Geo Blocking tab alongside rate limiting, custom login URL, and IP management, so the full protection stack stays in one place.
You might also like:

