Our Location
304 North Cardinal St.
Dorchester Center, MA 02124


Your login page is getting hammered with failed login attempts, and WordPress isn’t doing anything about it. That’s not a bug — WordPress has no native lockout mechanism. Without a plugin, an IP can attempt to log in an unlimited number of times with zero consequences.
A login lockout fixes that directly. It blocks an IP address from attempting further logins after it exceeds a defined number of failed attempts within a set time window. It’s one of the most effective defenses against brute force attacks on WordPress — and one of the few that stops the attack rather than just making it harder.
This guide explains how WordPress lockout works, how to configure it properly using BruteFort, and the one setup step that prevents you from accidentally locking yourself out of your own site.
Quick Answer: Set a max attempt threshold (5 is typical) and a time window (30 minutes is typical) in BruteFort’s Rate Limit Settings, then whitelist your own IP in IP Settings before turning it on. That combination blocks brute-force bots within minutes without any risk of locking out legitimate users.
A login lockout system tracks failed login attempts by IP address. When the number of failures from a single IP crosses a threshold — say, 5 attempts in 30 minutes — that IP gets blocked from the login page for a defined period. Any further login attempts from that IP during the lockout window are denied before WordPress even processes the credentials.
The effect on a brute force attack is immediate. A bot cycling through password lists at hundreds of attempts per minute gets locked out after 5 failures and stays locked out. Even if it retries from the same IP after the lockout expires, it only gets another 5 attempts before being locked out again. At 5 guesses per 30 minutes, cycling through a list of 10,000 passwords would take over 1,000 hours. Most bots move to an easier target the moment they hit a lockout.
BruteFort handles login lockout through two coordinated settings: the Rate Limit Settings (which define when a lockout triggers) and the Lockout Settings (which define what happens when it does).
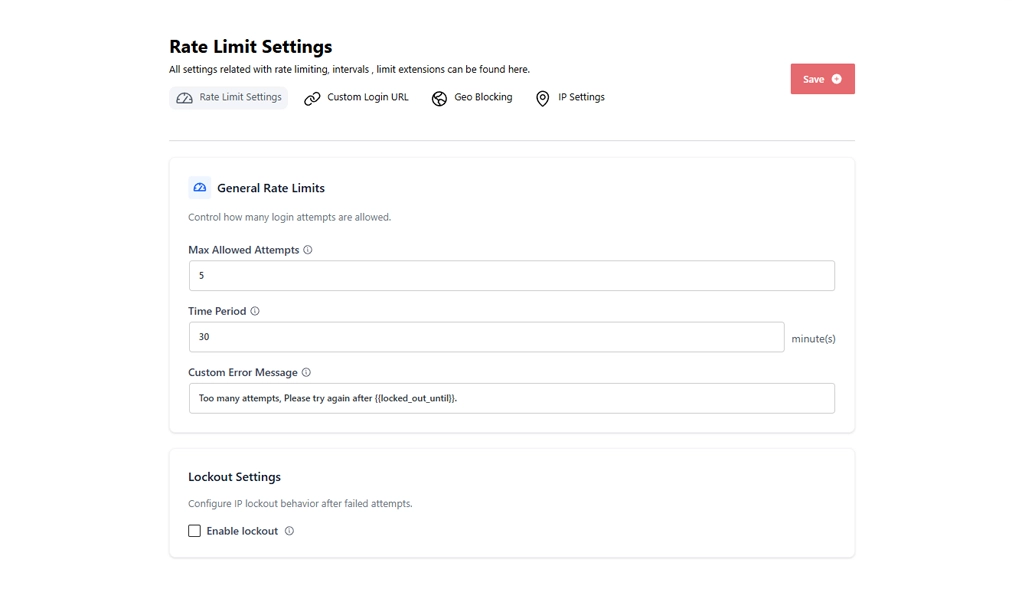
Go to BruteFort → Settings → Rate Limit Settings. Set your Max Allowed Attempts — the number of failed logins before lockout triggers — and your Time Period in minutes. The defaults (5 attempts, 30 minutes) work for most sites. For higher-security environments like WooCommerce stores or membership sites, 3 attempts per 60 minutes is a reasonable tightening.
The Custom Error Message field controls what a locked-out IP sees. Use the {{locked_out_until}} variable to insert the exact time the lockout expires. That gives legitimate users who simply mistyped their password a clear indication of when they can try again, rather than an opaque error.
The Lockout Settings section, just below Rate Limit Settings on the same page, lets you enable IP-level lockout as a persistent block for IPs that repeatedly return after temporary rate limit windows expire. This is the escalation layer: temporary rate limiting for first-time offenders, persistent lockout for persistent attackers. IPs that trigger repeated lockout cycles can then be moved to a permanent blacklist via the IP Settings tab.
Important: the most crucial step before enabling any lockout configuration is whitelisting your own IP address. Go to BruteFort → Settings → IP Settings, select WhiteList, enter your current IP (search “what is my IP” to find it), and click Add. Whitelisted IPs are completely exempt from rate limiting and lockout rules, regardless of how many failed attempts come from them.
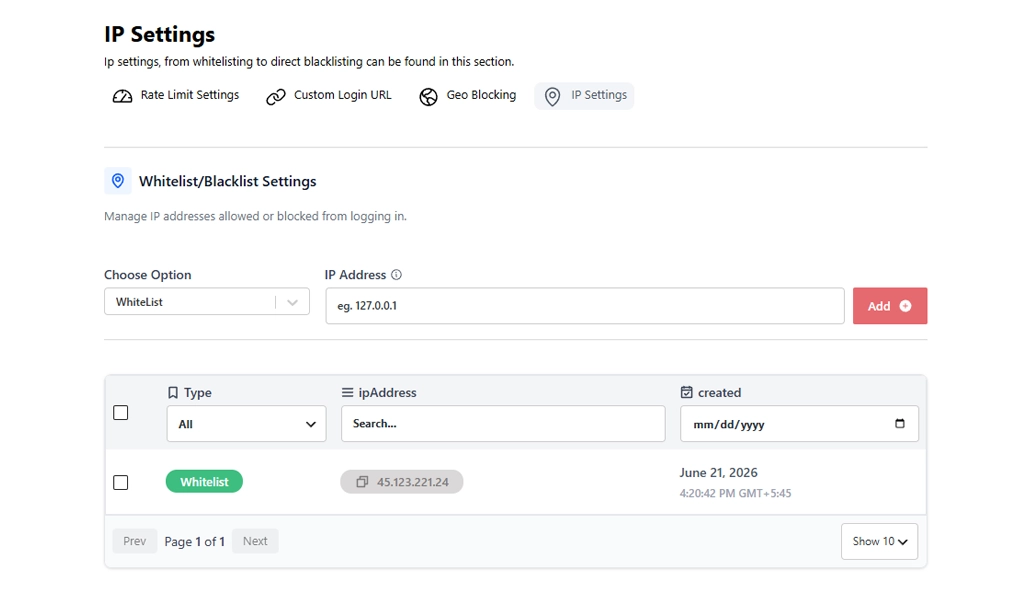
This is especially important if you work from multiple locations or have a dynamic IP that changes periodically. Add each location’s IP to the whitelist before tightening your lockout settings. Pro Tip: if you do accidentally lock yourself out before whitelisting, deactivate the BruteFort plugin temporarily via FTP — renaming its folder in /wp-content/plugins/ restores normal login access immediately.
BruteFort’s Logs screen records every lockout event with the triggering IP address, number of failed login attempts, current status (locked or expired), and timestamp. This log serves two purposes: it confirms the lockout system is working as expected, and it identifies IPs worth moving to the permanent blacklist.
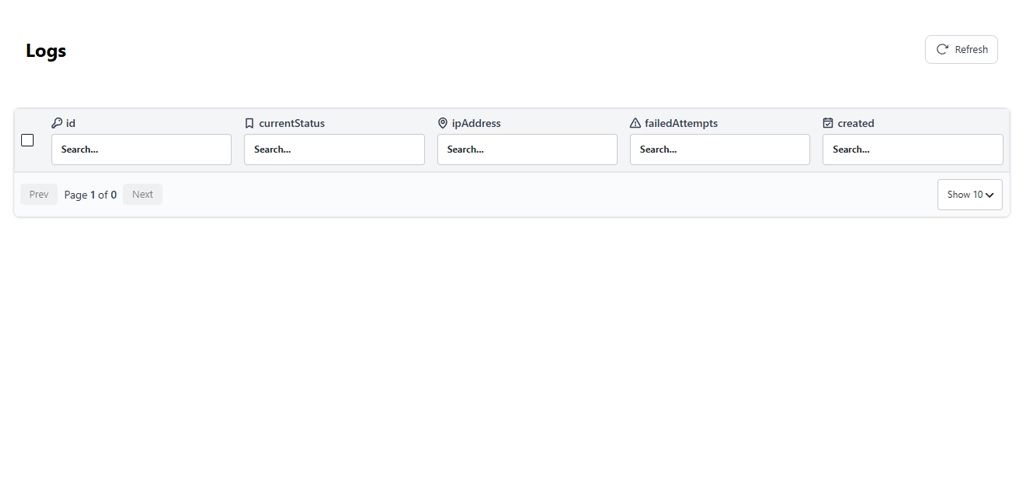
An IP that appears in the logs once is routine bot traffic — it hit the limit, got blocked, and likely moved on. An IP that appears repeatedly across multiple lockout cycles is a persistent attacker and a good candidate for a permanent blacklist entry in IP Settings.
BruteFort’s lockout duration is tied to the rate limit time period you configure. A 30-minute window means an IP is blocked until 30 minutes have elapsed since the first failed attempt in that window. For most sites this is sufficient — it makes automated attacks impractical without leaving a legitimate user locked out for hours. If you’re seeing persistent attackers returning after the window expires, escalating to a permanent blacklist is more effective than lengthening the temporary lockout window.
It can. Organizations where many users share a single public IP address could see one user’s failed attempts trigger a lockout that affects all users from that IP. The solution is whitelisting the shared IP address if it’s a trusted source. For public-facing sites where you can’t predict all IPs, keeping the attempt threshold at 5 rather than 3 reduces the chance of legitimate users hitting the limit.
Lockout is effective but works best in combination with a custom login URL. The custom URL eliminates the bots that target the default /wp-login.php path — they never reach the login form at all, so the lockout never needs to fire. For any attacker who does find your login page, the lockout kicks in after a few attempts. Together, both layers handle the full range of login attack scenarios without depending on either one alone.
BruteFort’s Logs show the IP address that triggered each lockout, not the username being attempted. The IP is the most actionable data point for security purposes — it’s what you block. If you need to know which usernames are being targeted (useful for identifying accounts with weak passwords), a dedicated activity log plugin can provide that detail alongside BruteFort’s IP-level data.
A properly configured login lockout turns a limitless attack surface into a near-impossible one. Whitelist your own IP first, set your thresholds, and let BruteFort’s logs show you the attack traffic that’s already being blocked. BruteFort handles the full lockout stack — rate limiting, persistent lockout, IP blacklisting, and whitelist management — from a single free plugin.
You might also like:

